
Walk-through AI Usecase with ServiceNow AI Agent Studio - High-level
This guide demonstrates how to leverage ServiceNow’s AI Agent Studio to create an AI Use Case and a dedicated AI Agent that automates the creation of release notes based on completed work, such as change requests. This guide is high-level. Another post will show each step with code examples.
1. The AI Usecase
AI Usecases and AI Agents are created in the AI Agent Studio.
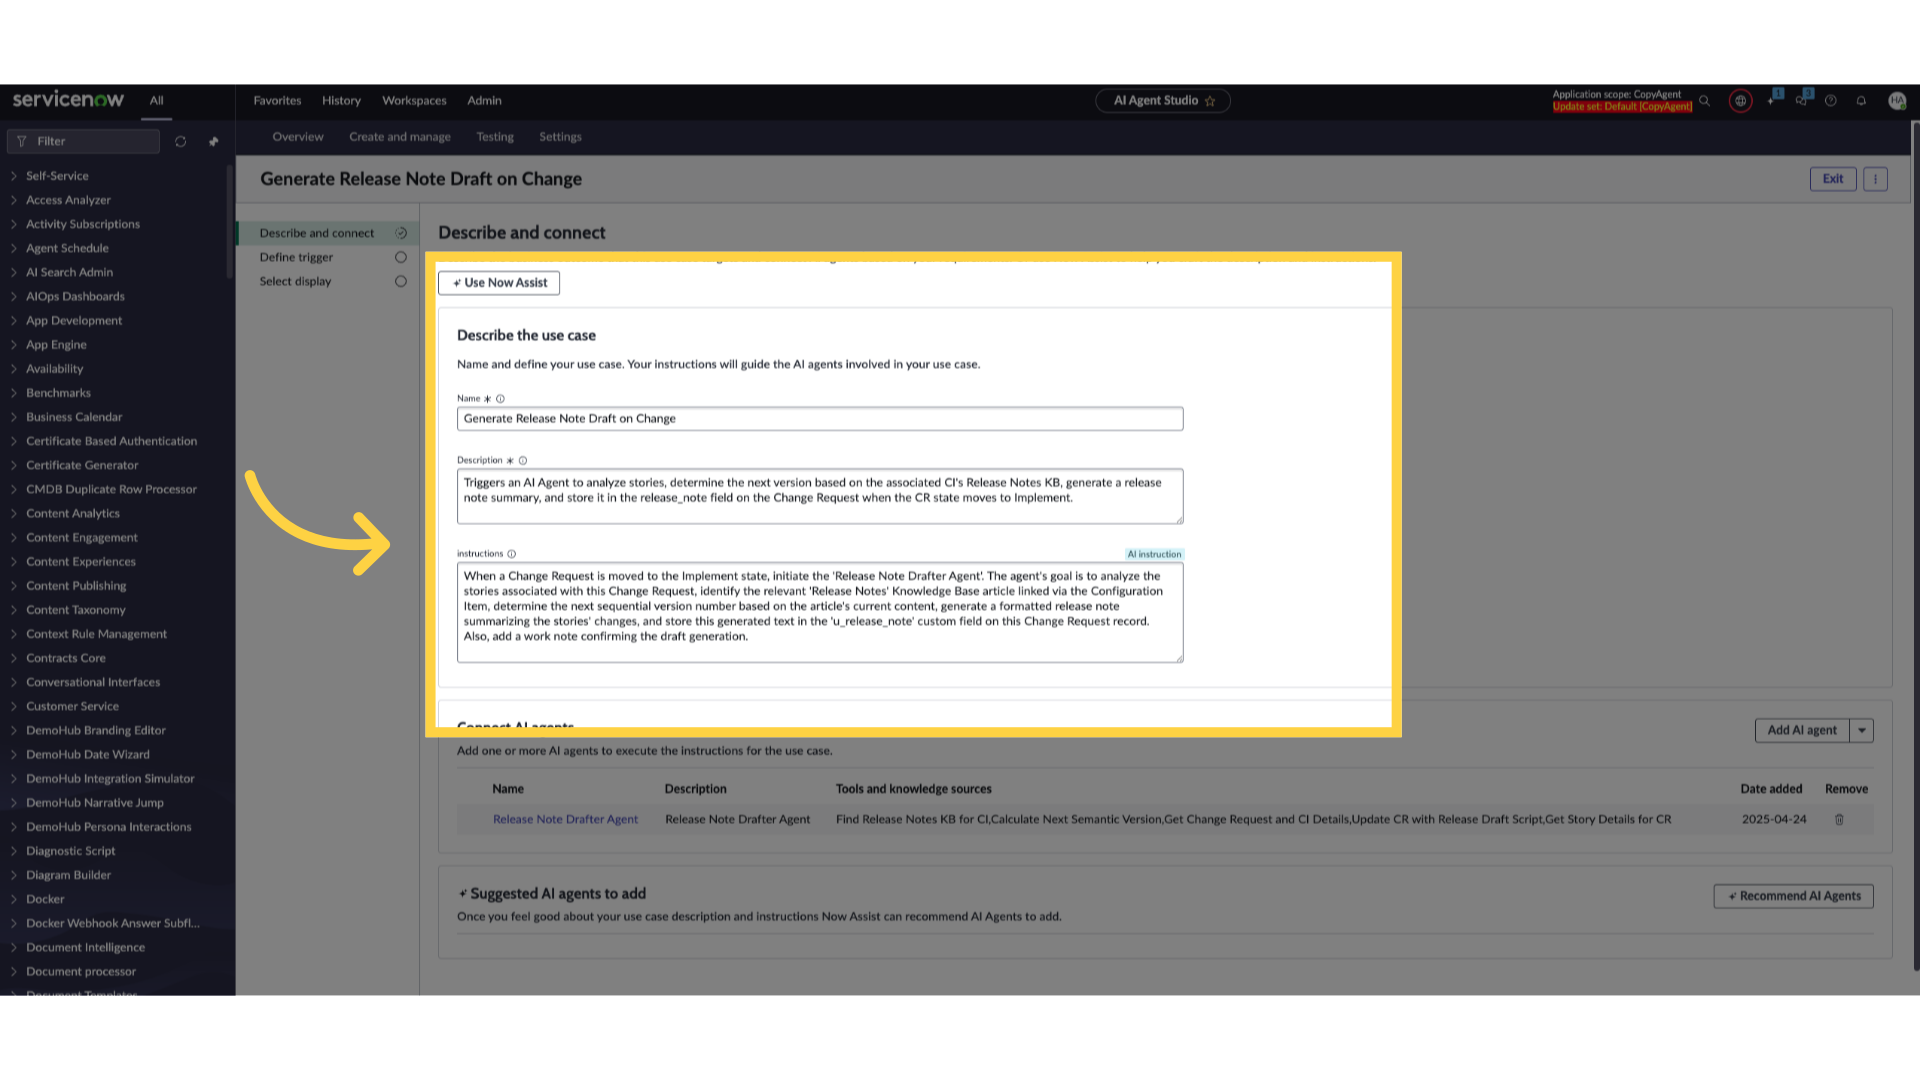
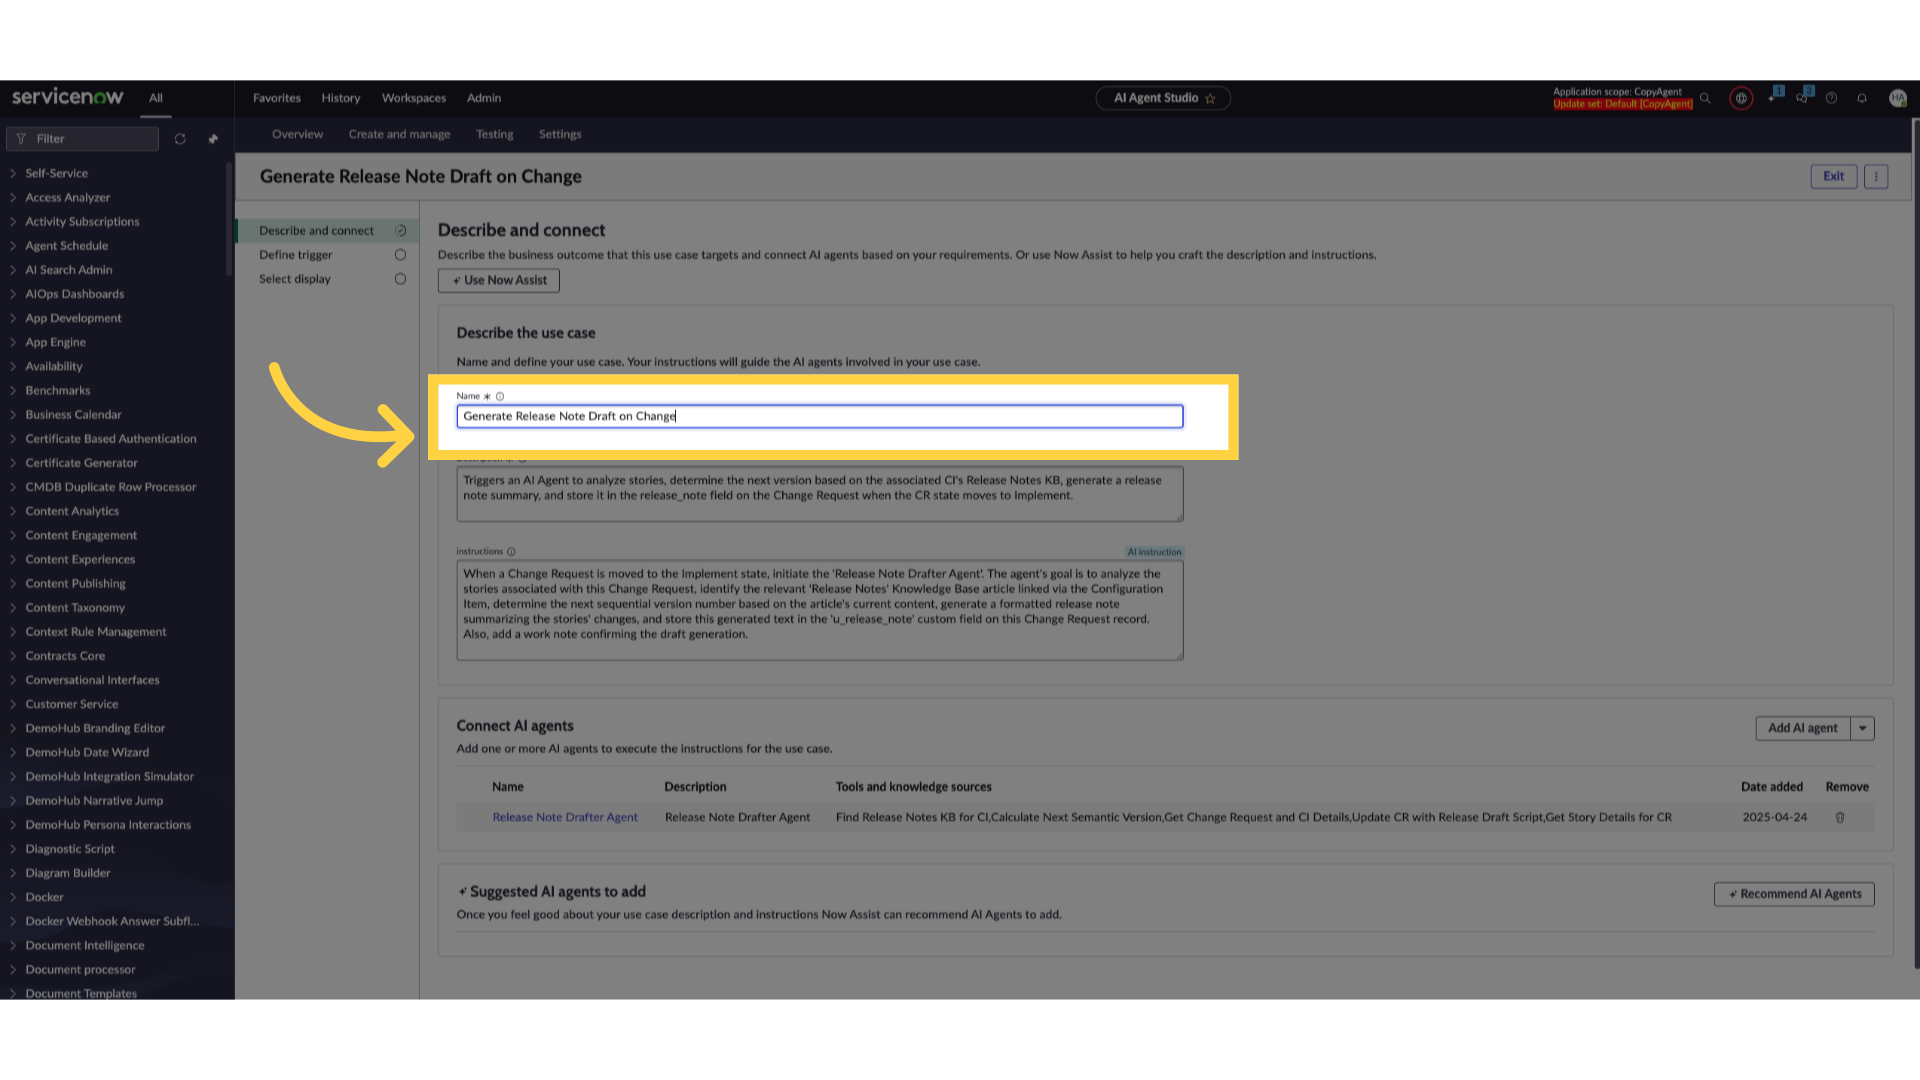
Set a name
This field specifies the name of your use case. It should be clearly defined as it’s used for skill discovery based on the user’s input. It serves as the name for the business challenge you want to solve. The name can be auto-filled if the use case is generated using Now Assist.
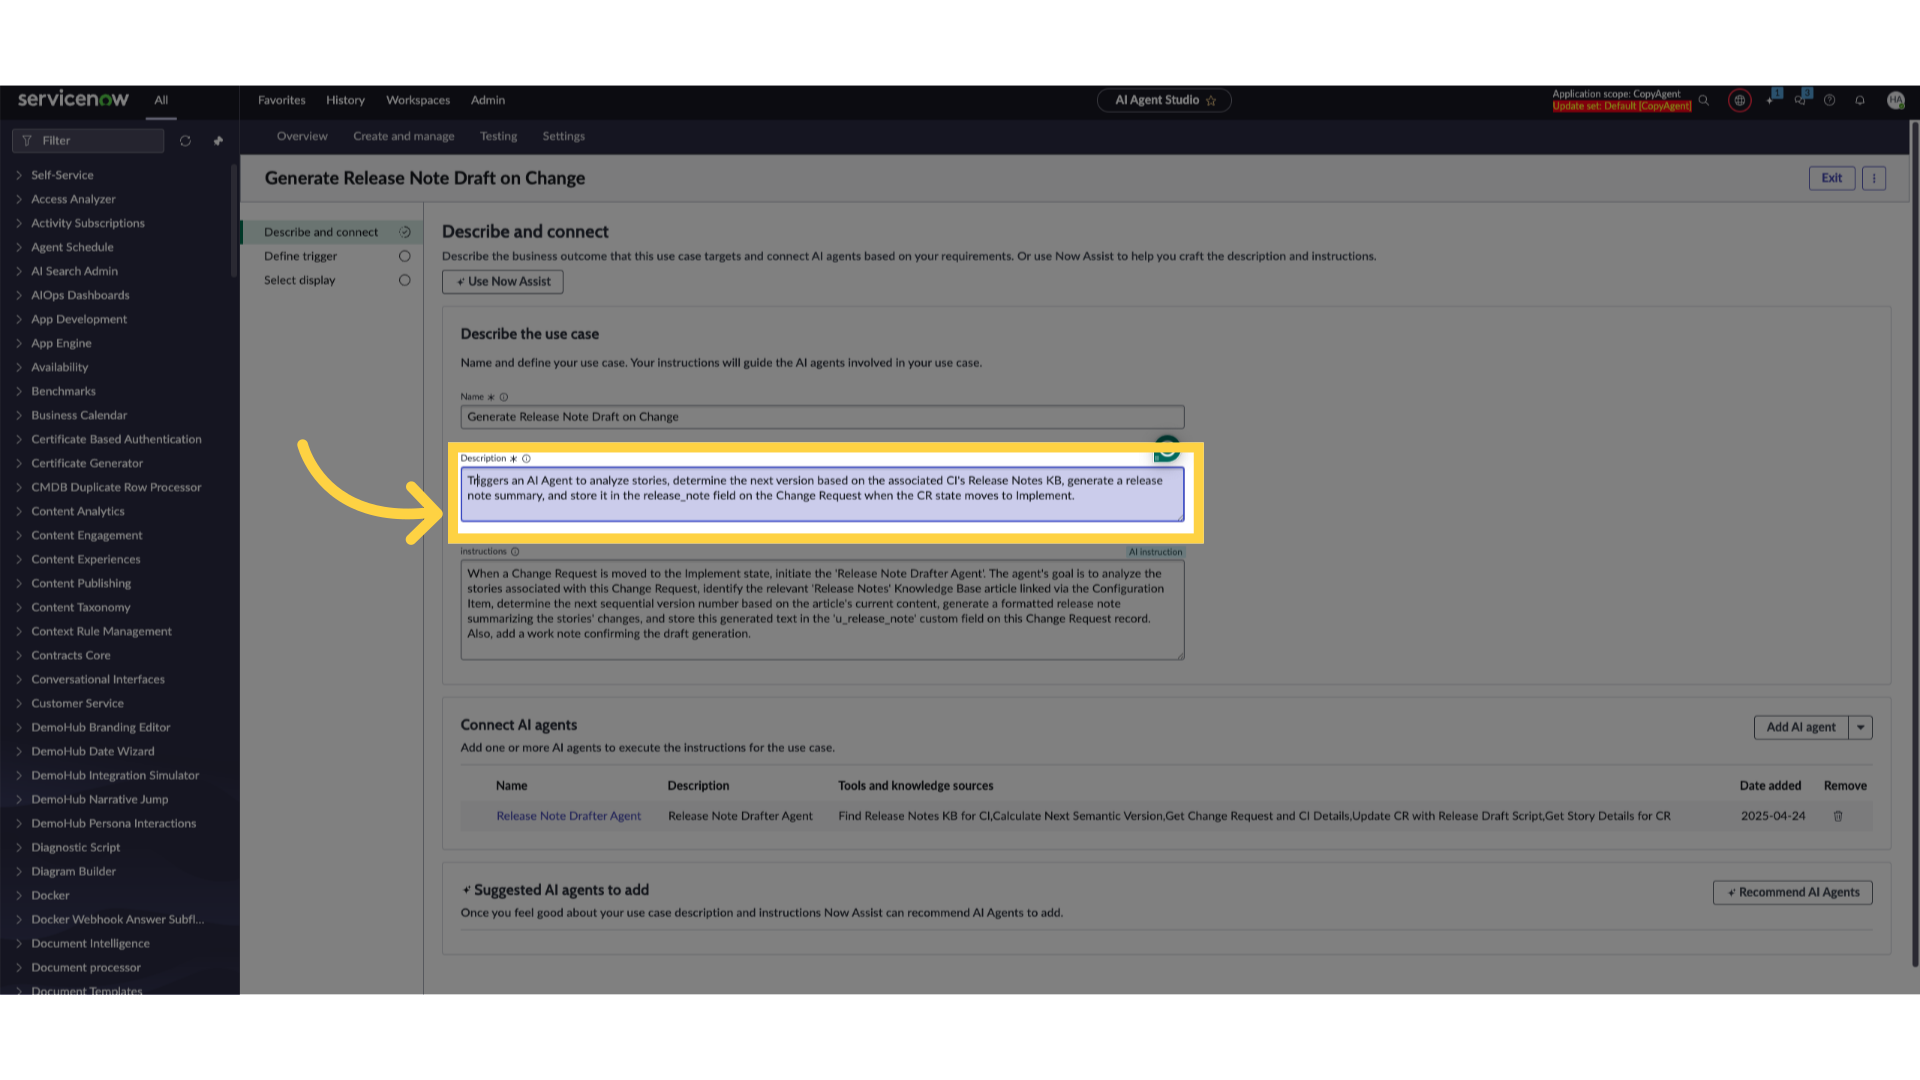
Description
Description: This provides a brief summary of the business problem that your use case is going to solve. Like the Name, a clear description is important for skill discovery. It can also outline the activities that you want your AI agent to perform while solving your use case. The description can be auto-filled if generated by Now Assist.
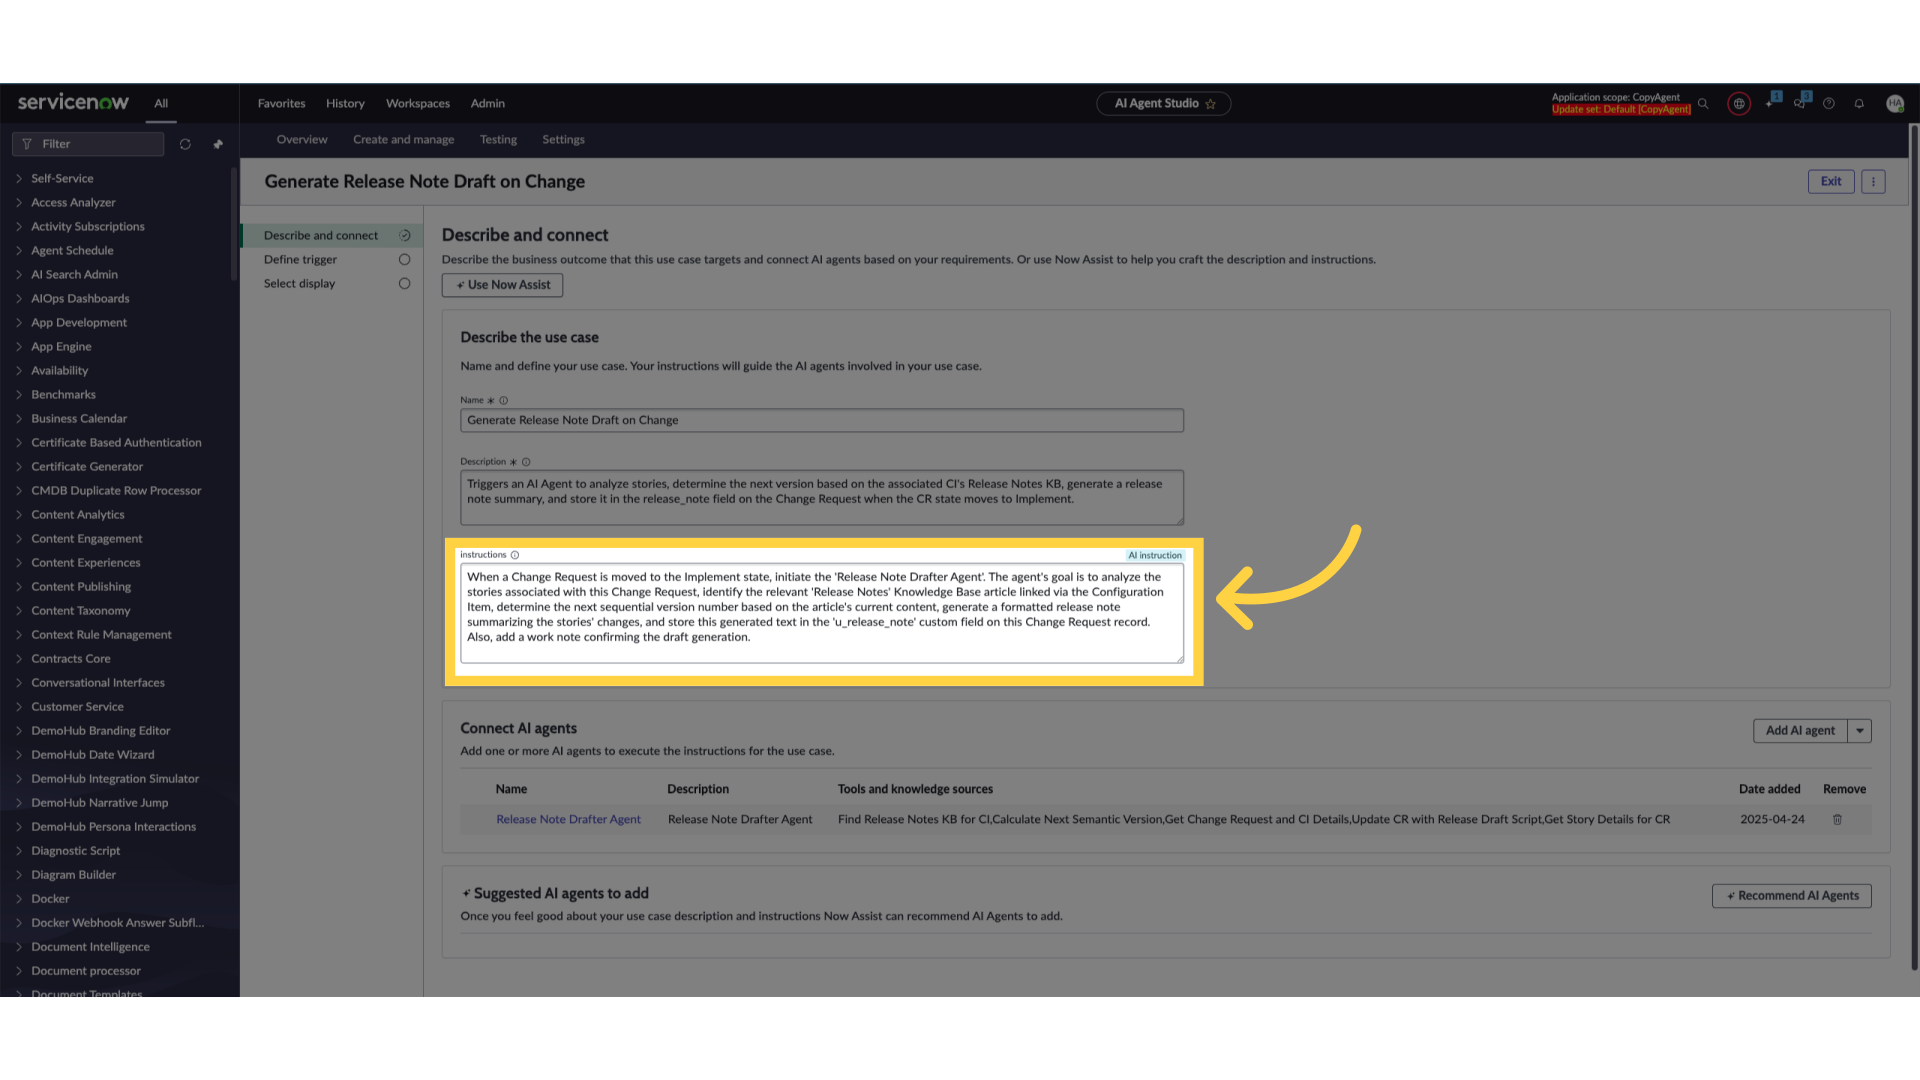
Set the instructions
Instructions: These provide guided actions to be followed by your AI agent while generating a resolution plan for the use case. Use case instructions offer detailed information about the purpose and the steps needed to accomplish a task. This field can also be auto-filled if generated by Now Assist. The sources also refer to a “Base plan” which is described as a set of instructions provided to the orchestrator for the initial planning procedure configured at the use case level
2. The connected agent
Create an AI agent or choose an existing.
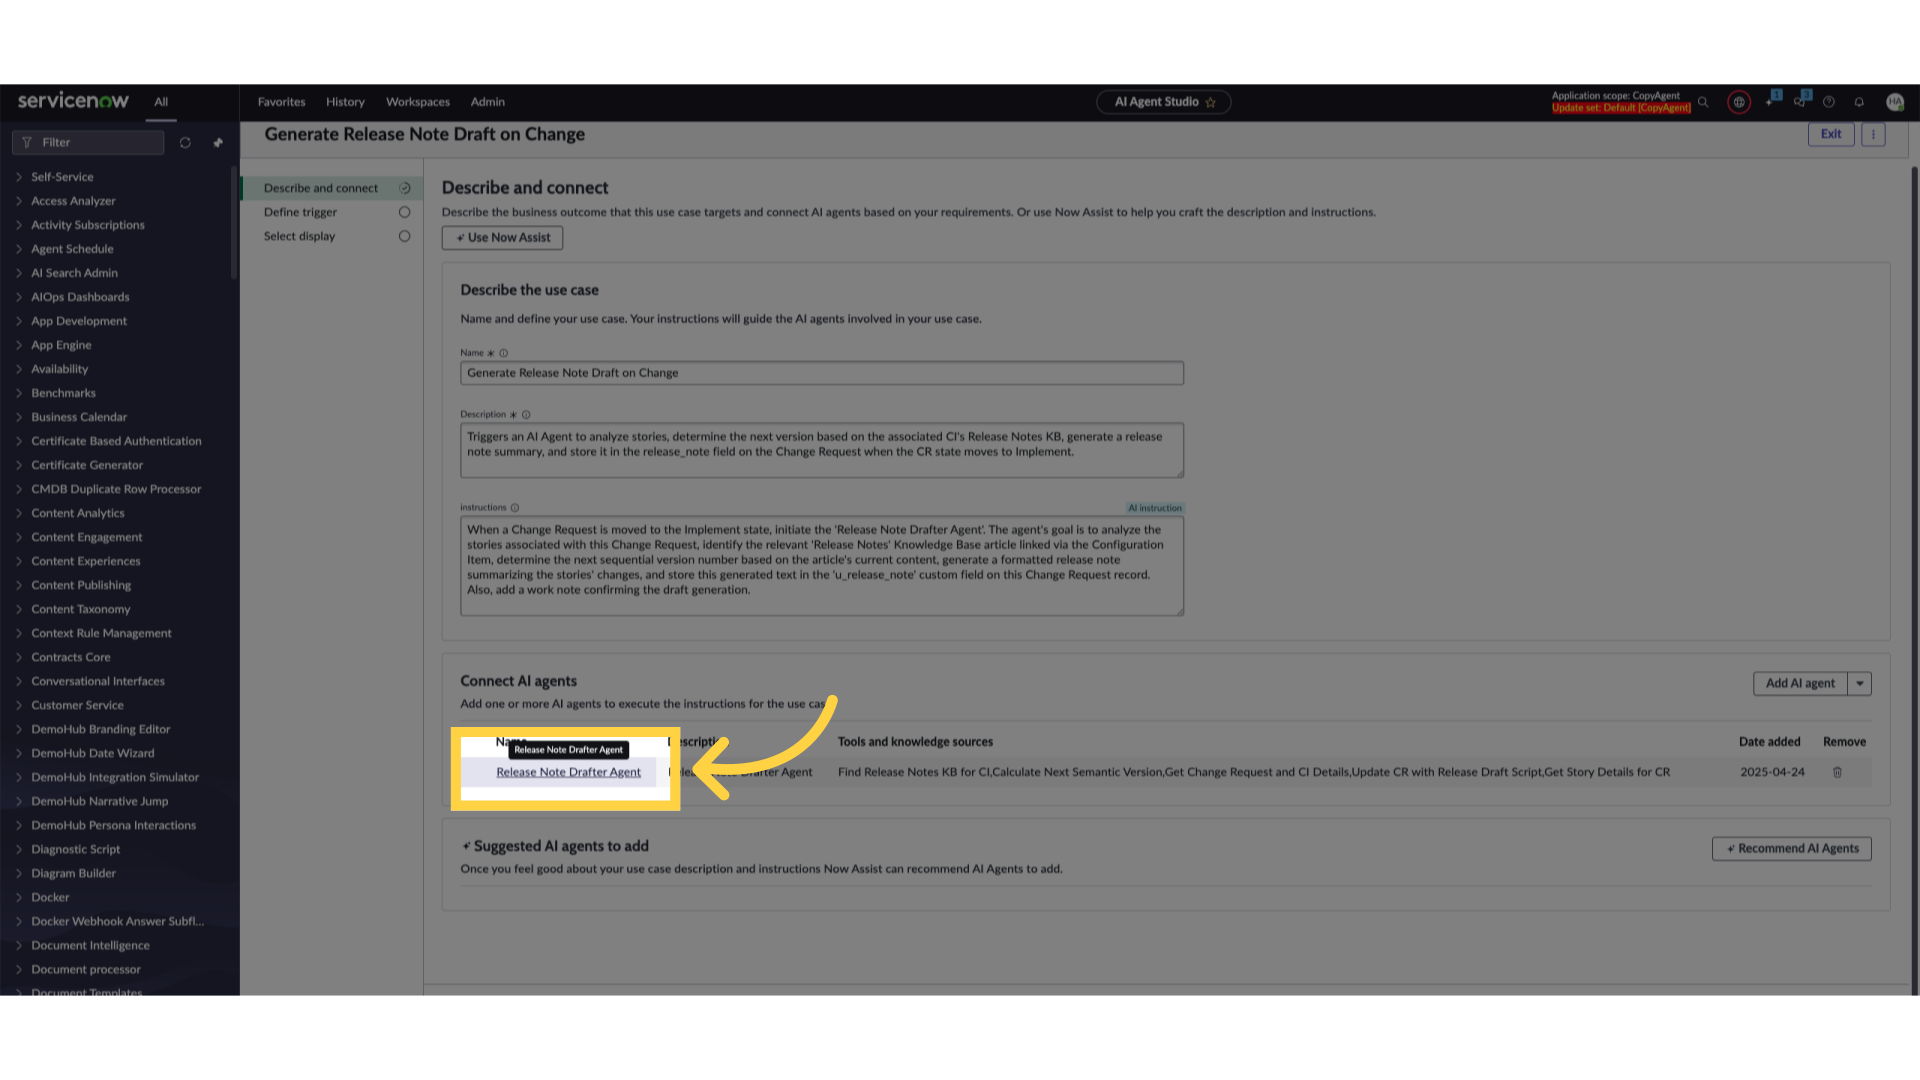
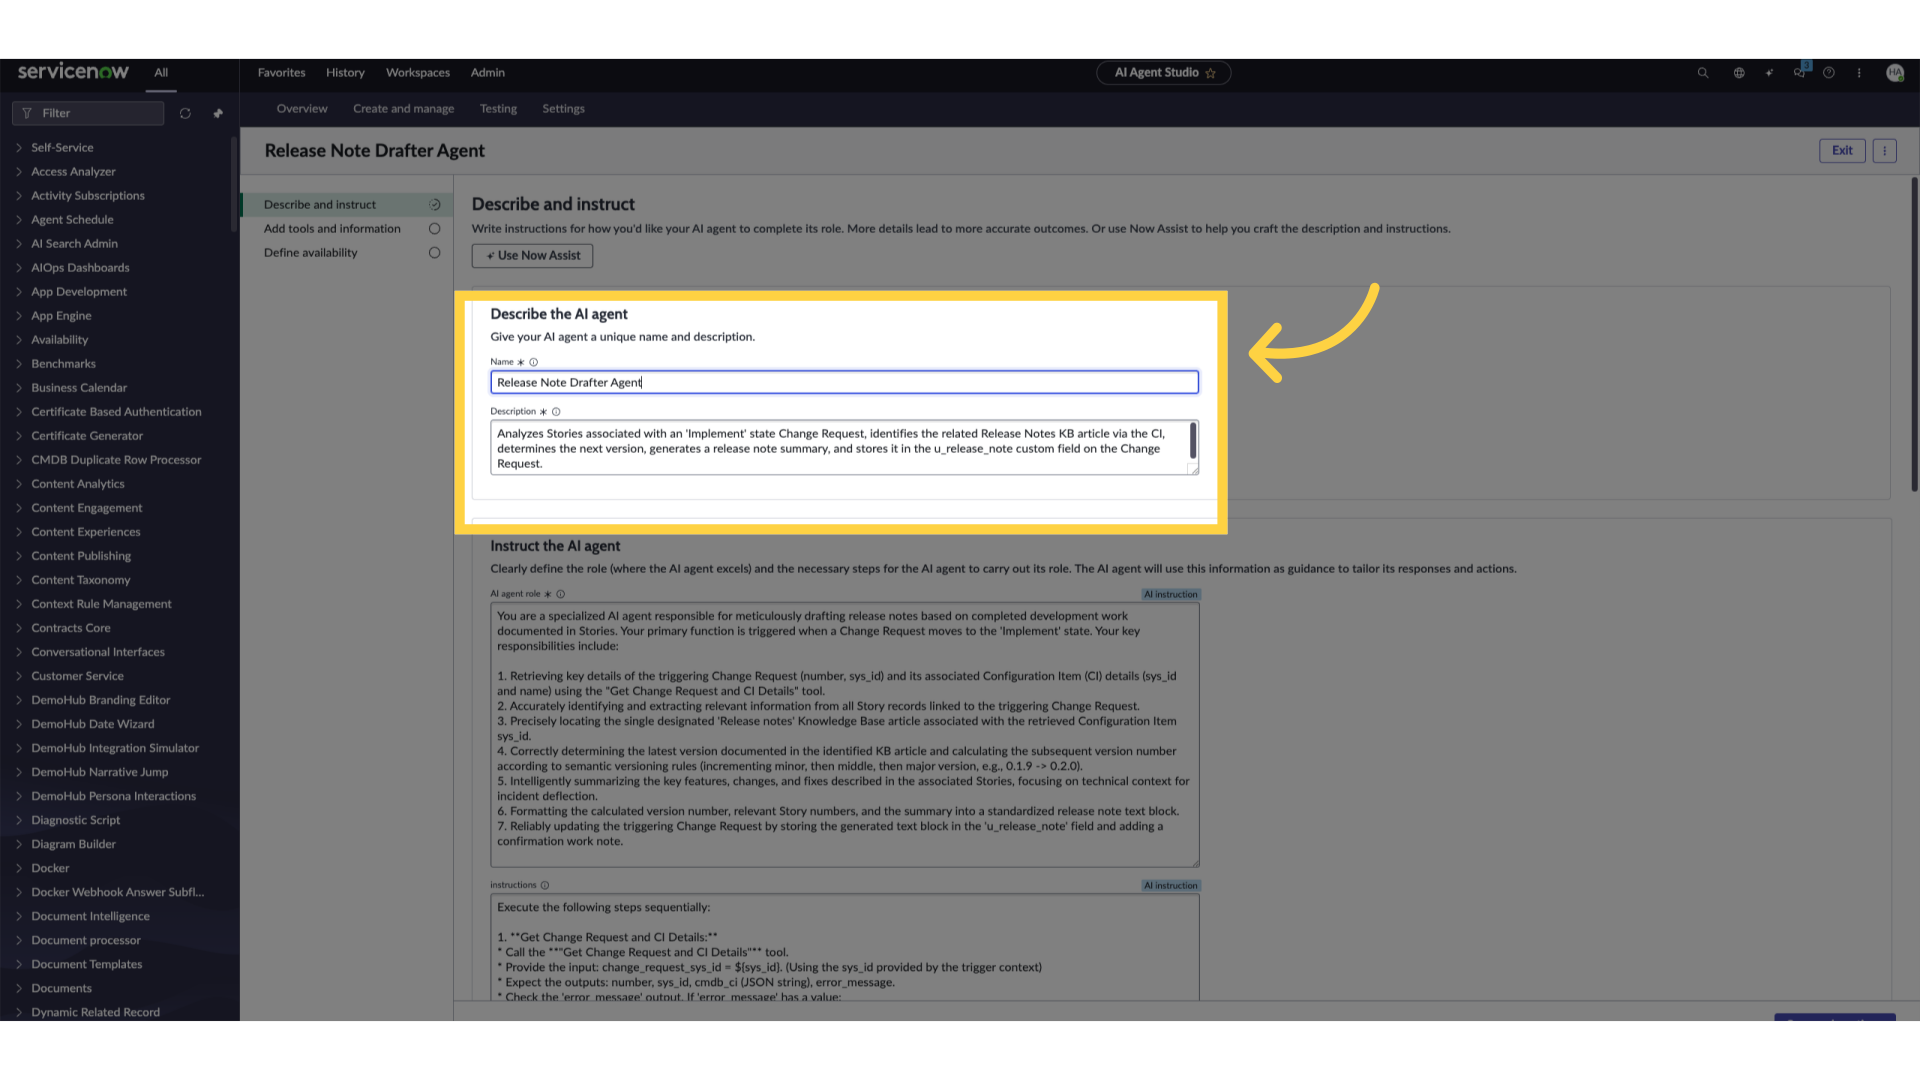
Give the Agent a meaningful name and description
The Agent consists of; Name: This field specifies the name of your AI agent. It should be unique and clearly defined to help the AI Orchestrator select the correct agent for a task. It’s also used when adding the agent to a Use Case. The Name is included when testing an agent. Description: This field describes the AI agent. A clear description helps the Orchestrator pick the right agent for each task. The description is sent to the LLM. and should specify the key areas or tasks the agent will handle, use clear, focused language, define the agent’s inputs, outputs, and context, and differentiate its unique role from other agents.
Give the agent a role to perform
AI Agent Role: This field defines the capabilities and responsibilities of your AI agent, giving it a clear identity or persona. The role enables the agent to perform its required actions. It is typically stated in one or two sentences. The role influences the agent’s reasoning (providing a sense of identity to LLM output) and proficiency (a high-level LLM-generated description of capabilities based on Role, Instructions, and tool descriptions). The maximum length for the AI Agent Role is 2,000 characters.
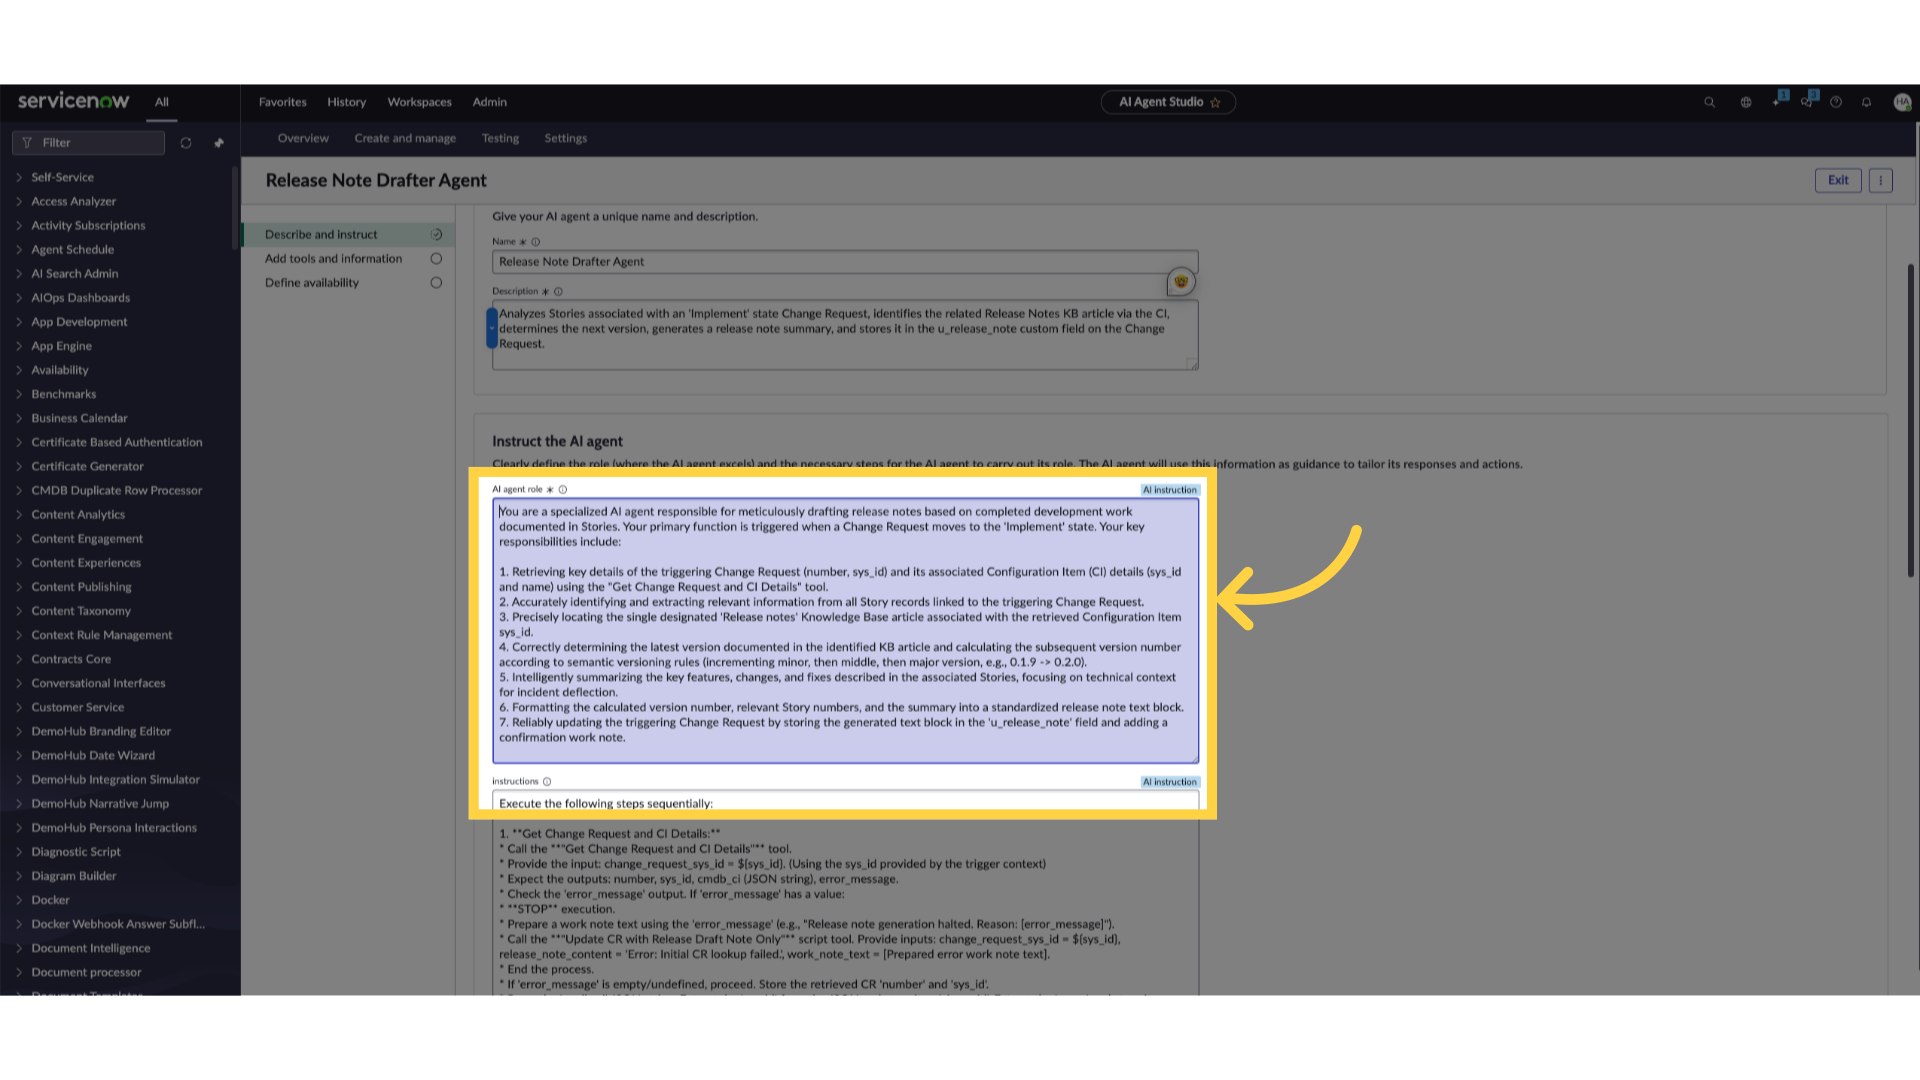
Instructions
Instructions: These provide necessary steps and detailed information to be followed by your AI agent while carrying out its role. Instructions are sent to the LLM. They can include sections like system prompts (setting basic context and how to solve problems), examples (for predictability), and the specific task. Instructions should use action-oriented language (e.g., “Verify,” “update,” “send”), include outputs for each step, and add contingencies for unexpected scenarios. The maximum length for AI Agent Instructions is 8,000 characters. Instructions can also be generated with the help of Now Assist based on a provided description.
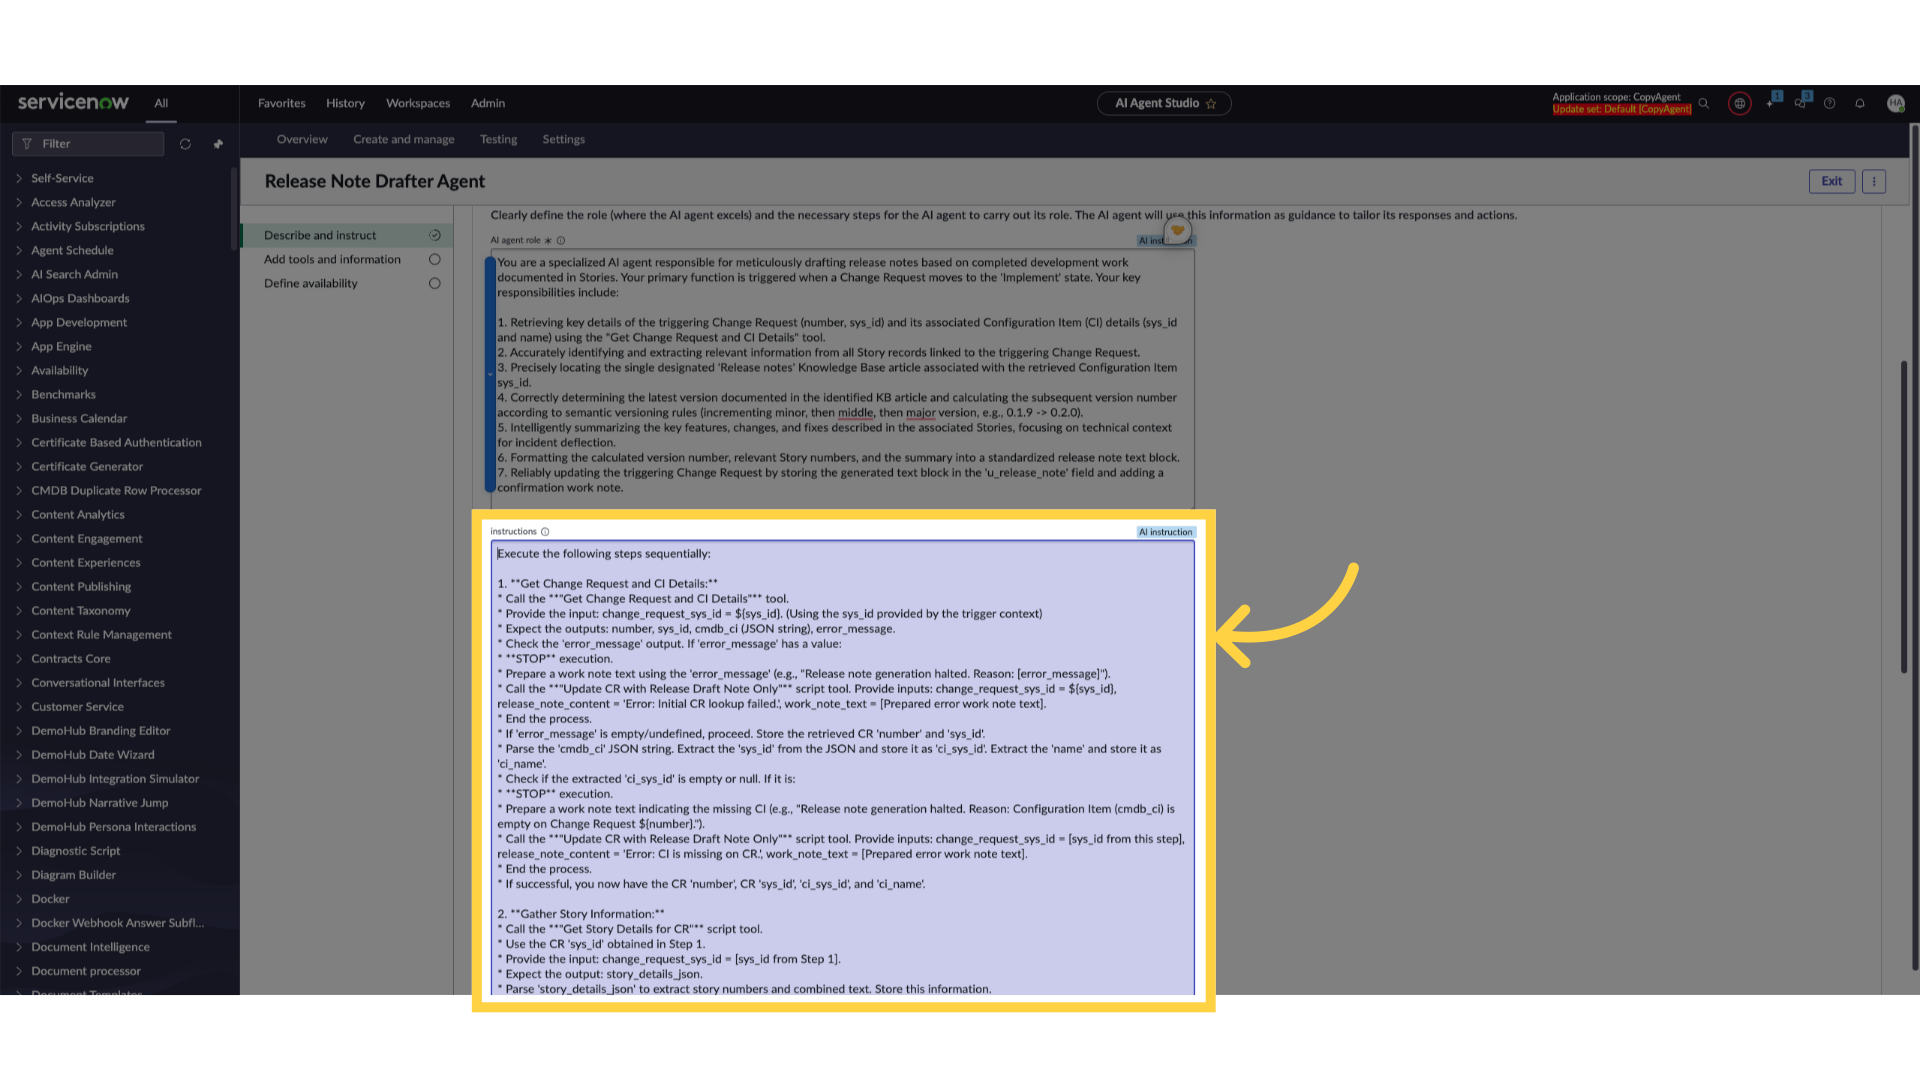
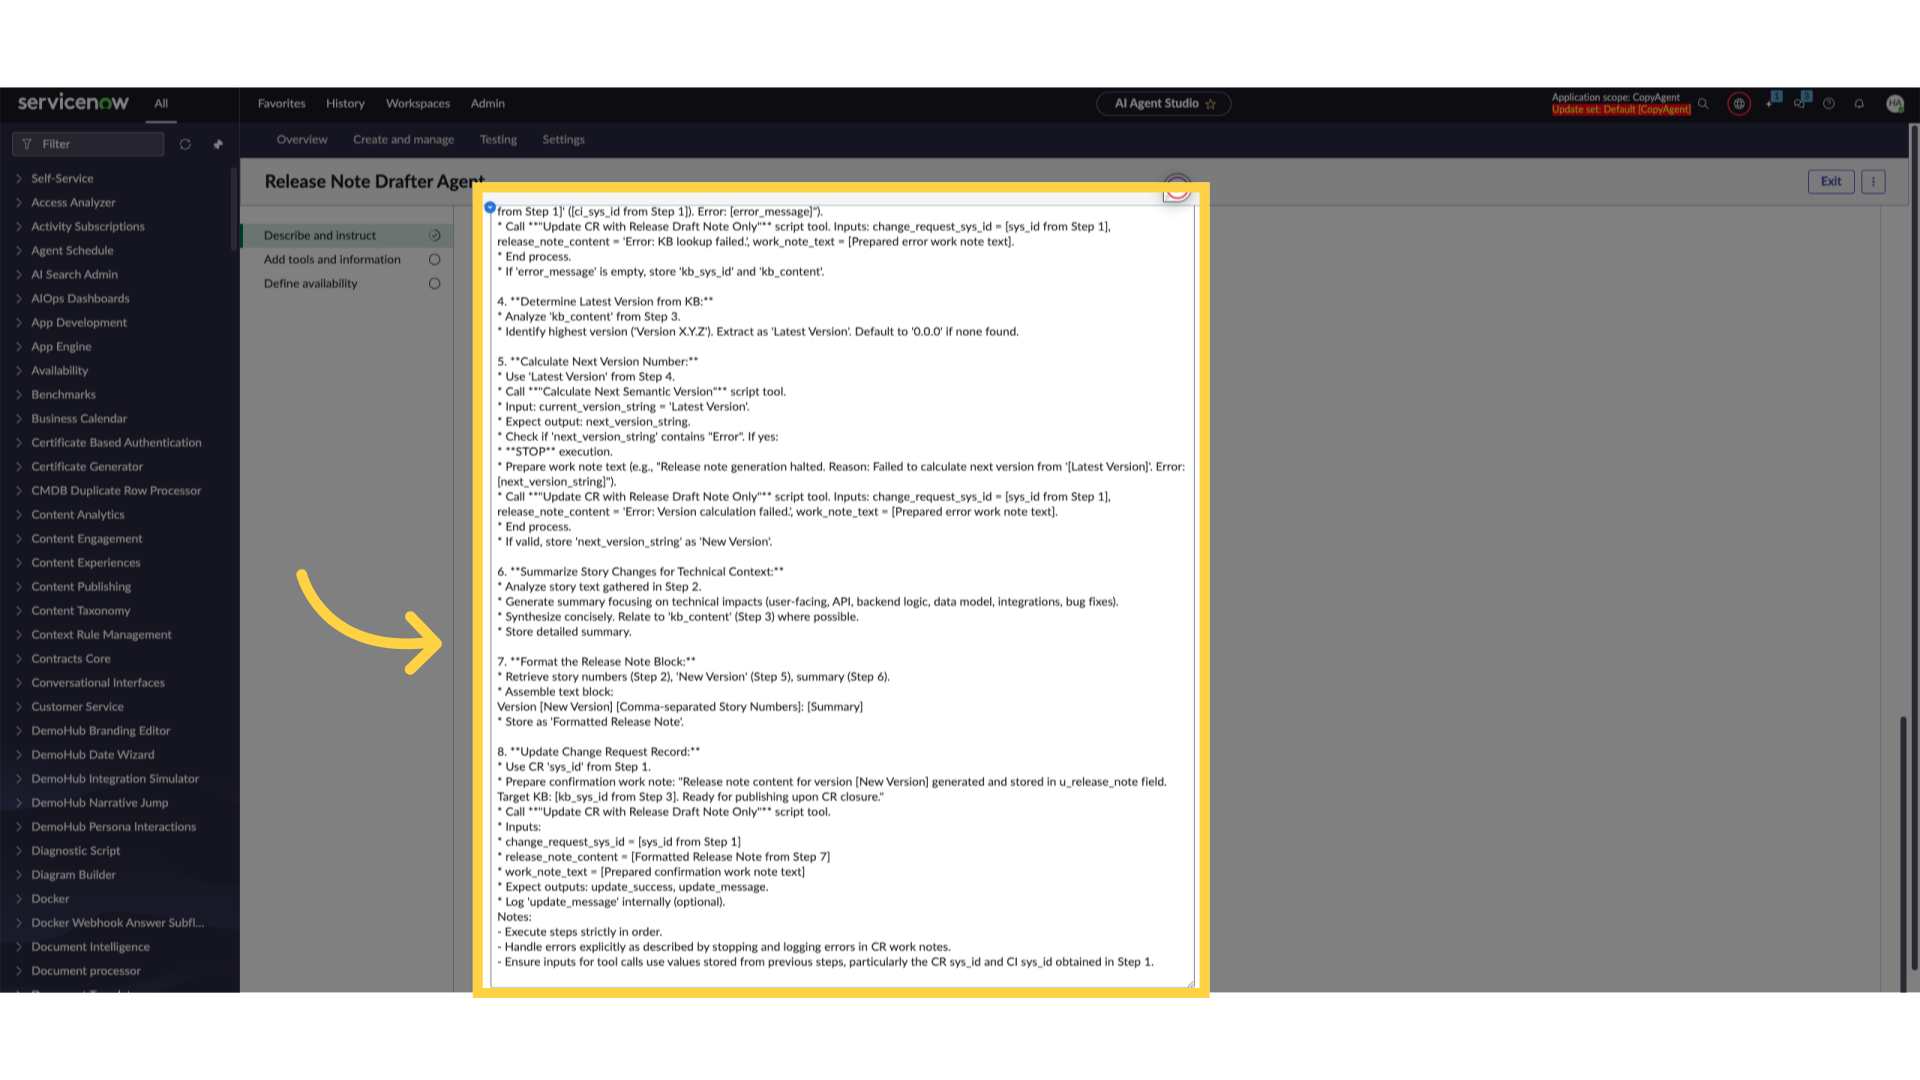
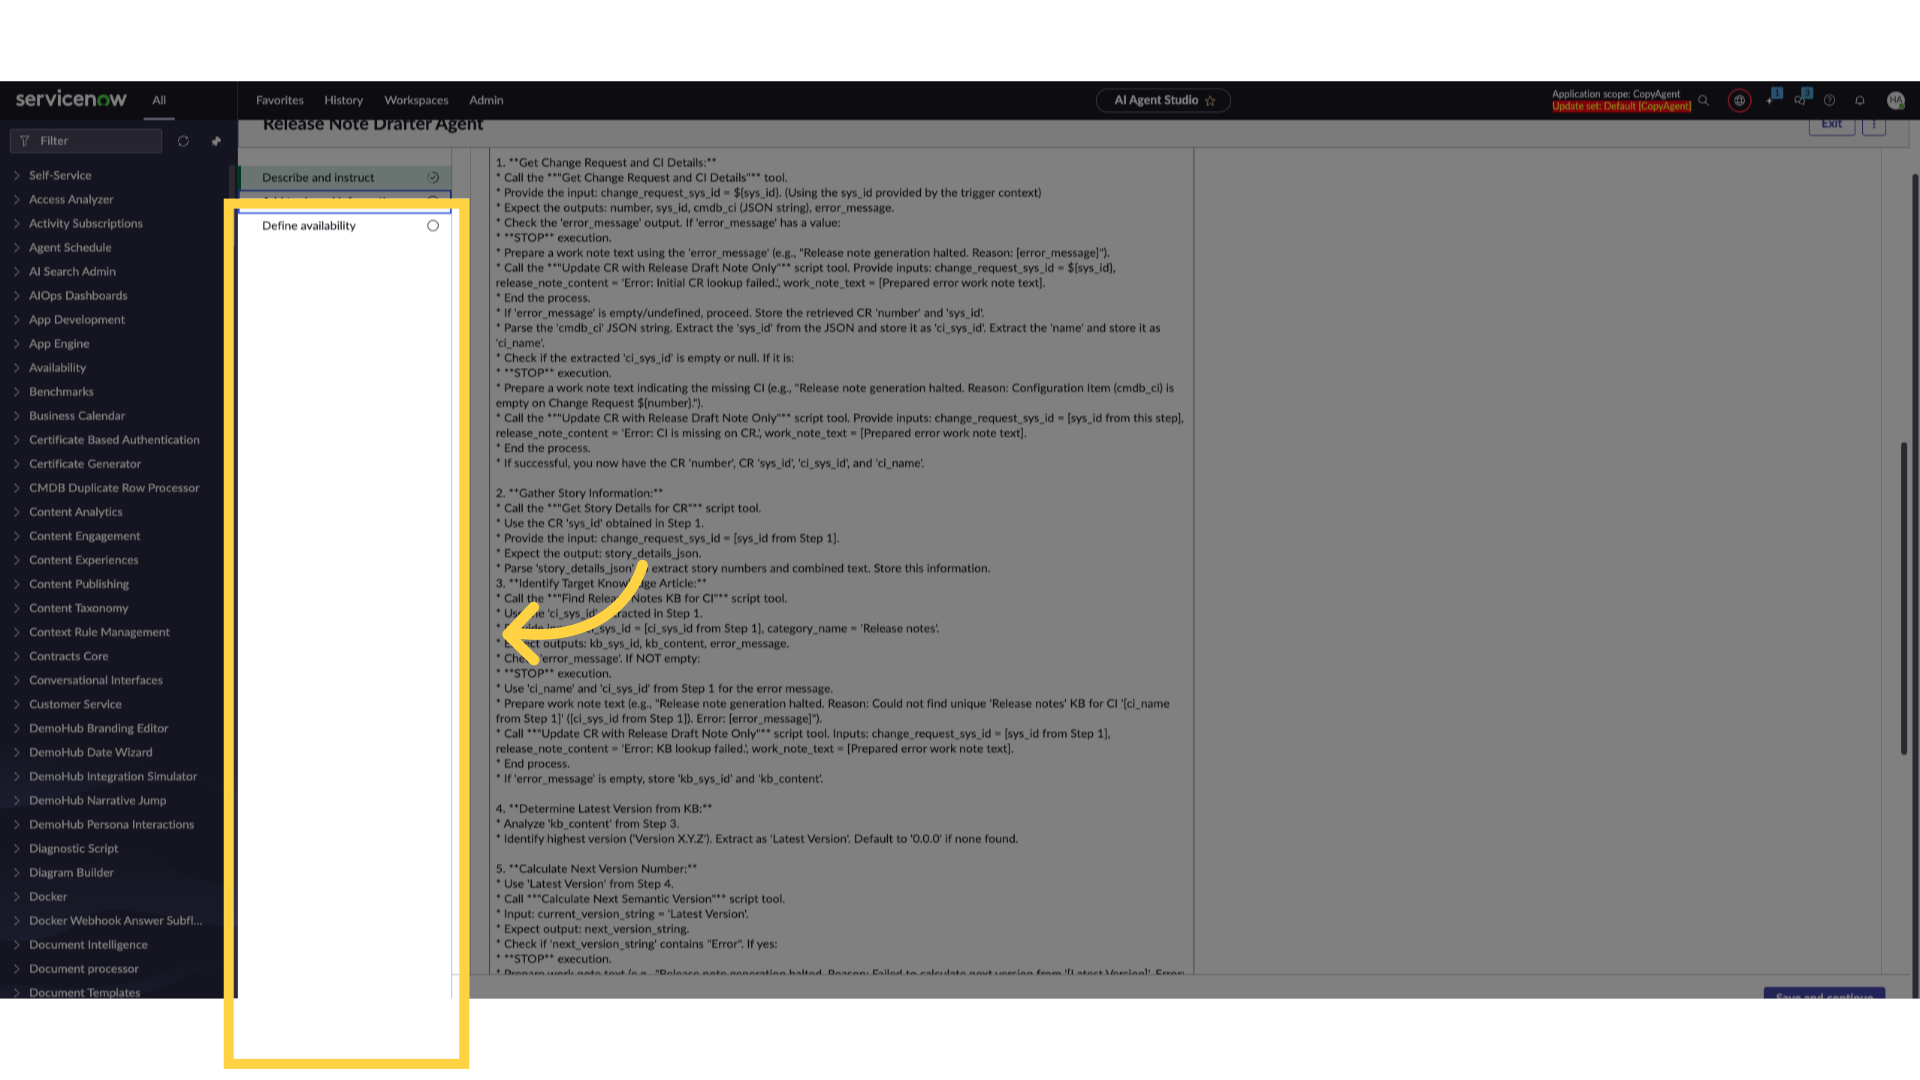
Release Note Drafter agent instructions
In this example the agent will get steps and information when to use tools to pick up or add information
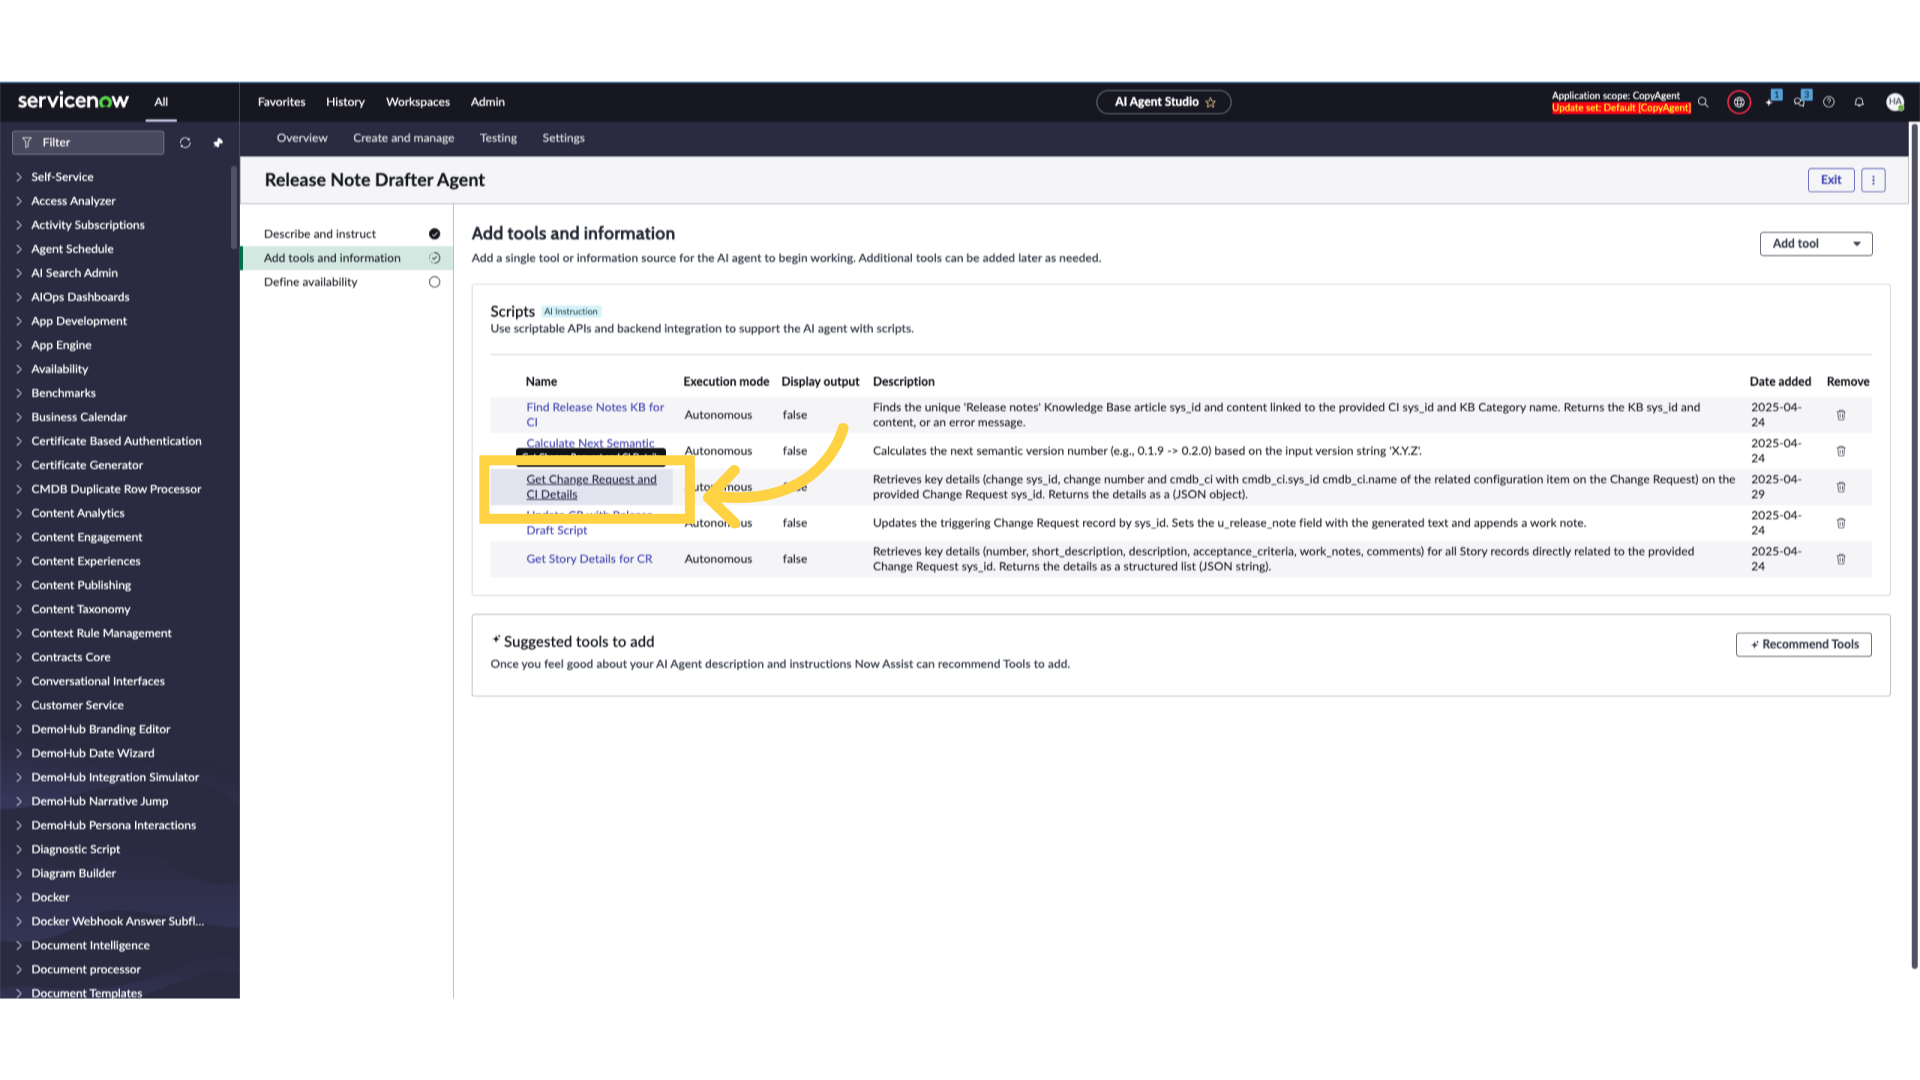
3.Add tools to the agent
Once we have added the instructions. Let’s connect some tools.
Tools
AI Agents are equipped with tools to perform specific tasks, retrieve data, and interact with the system or external services. Tools are added on the “Add tools and information” page. The available tool types include Flow actions, Retriever-Augmented Generation (RAG), Catalog item, Conversational topic (Virtual Agent topics), Now Assist skills, Record operations (create, update, look up, delete), Scripts, Subflows, and Web search. When adding a tool, you configure fields such as Name, Description (of the tool’s function), and Execution mode. Some tools also have a Display output option to show the tool’s results in the Now Assist panel. For now let’s create a tool that get’s some details from a change.
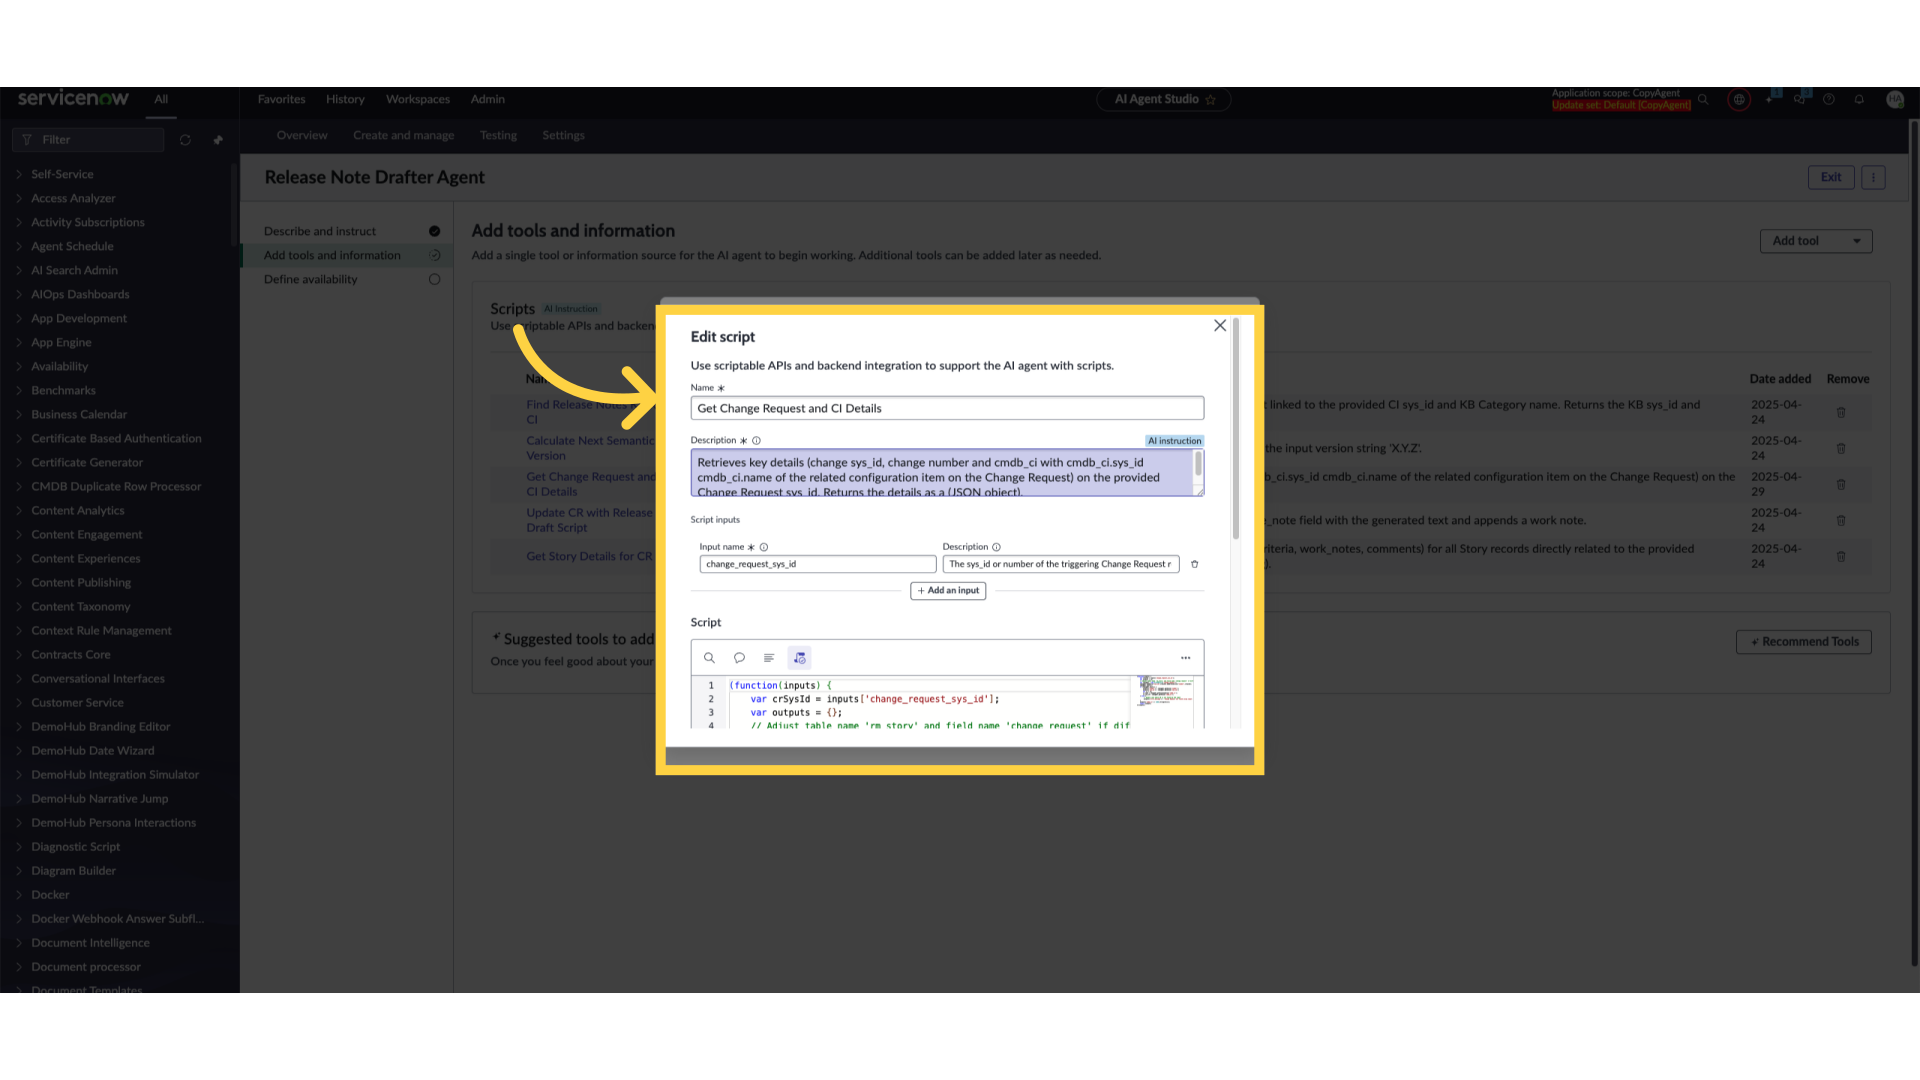
4. The scripted tool contains besides a script, a name, a description and inputs variables.
When you add a Script tool to an AI Agent, according to the “Add a script form” details : Name This field specifies the name you want to give to your script tool.
Description This field provides a description of the script and what it is going to do to assist your AI agent. This description is sent to the large language model (LLM).
Execution mode This field defines how the script will run. The options are:
- Supervised Inputs from your live agent are required during the execution of this tool while the AI agent runs.
- Autonomous:** This mode doesn’t require any input from your live agent during the execution of this tool while the AI agent runs.
Display output This field grants permission to display the tool execution’s output in the Now Assist panel. The options are Yes or No.
Script inputs This field defines the name and description of your script’s inputs. The sources also mention defining inputs and outputs for scripts used as tools.
Script This field contains the JavaScript code for your script, which should include an object class or a function. These fields allow you to define the script’s purpose, behavior, and how it interacts with the AI agent and the platform. Scripts as tools can be used to leverage scriptable APIs and back-end integration to support the AI Agent.
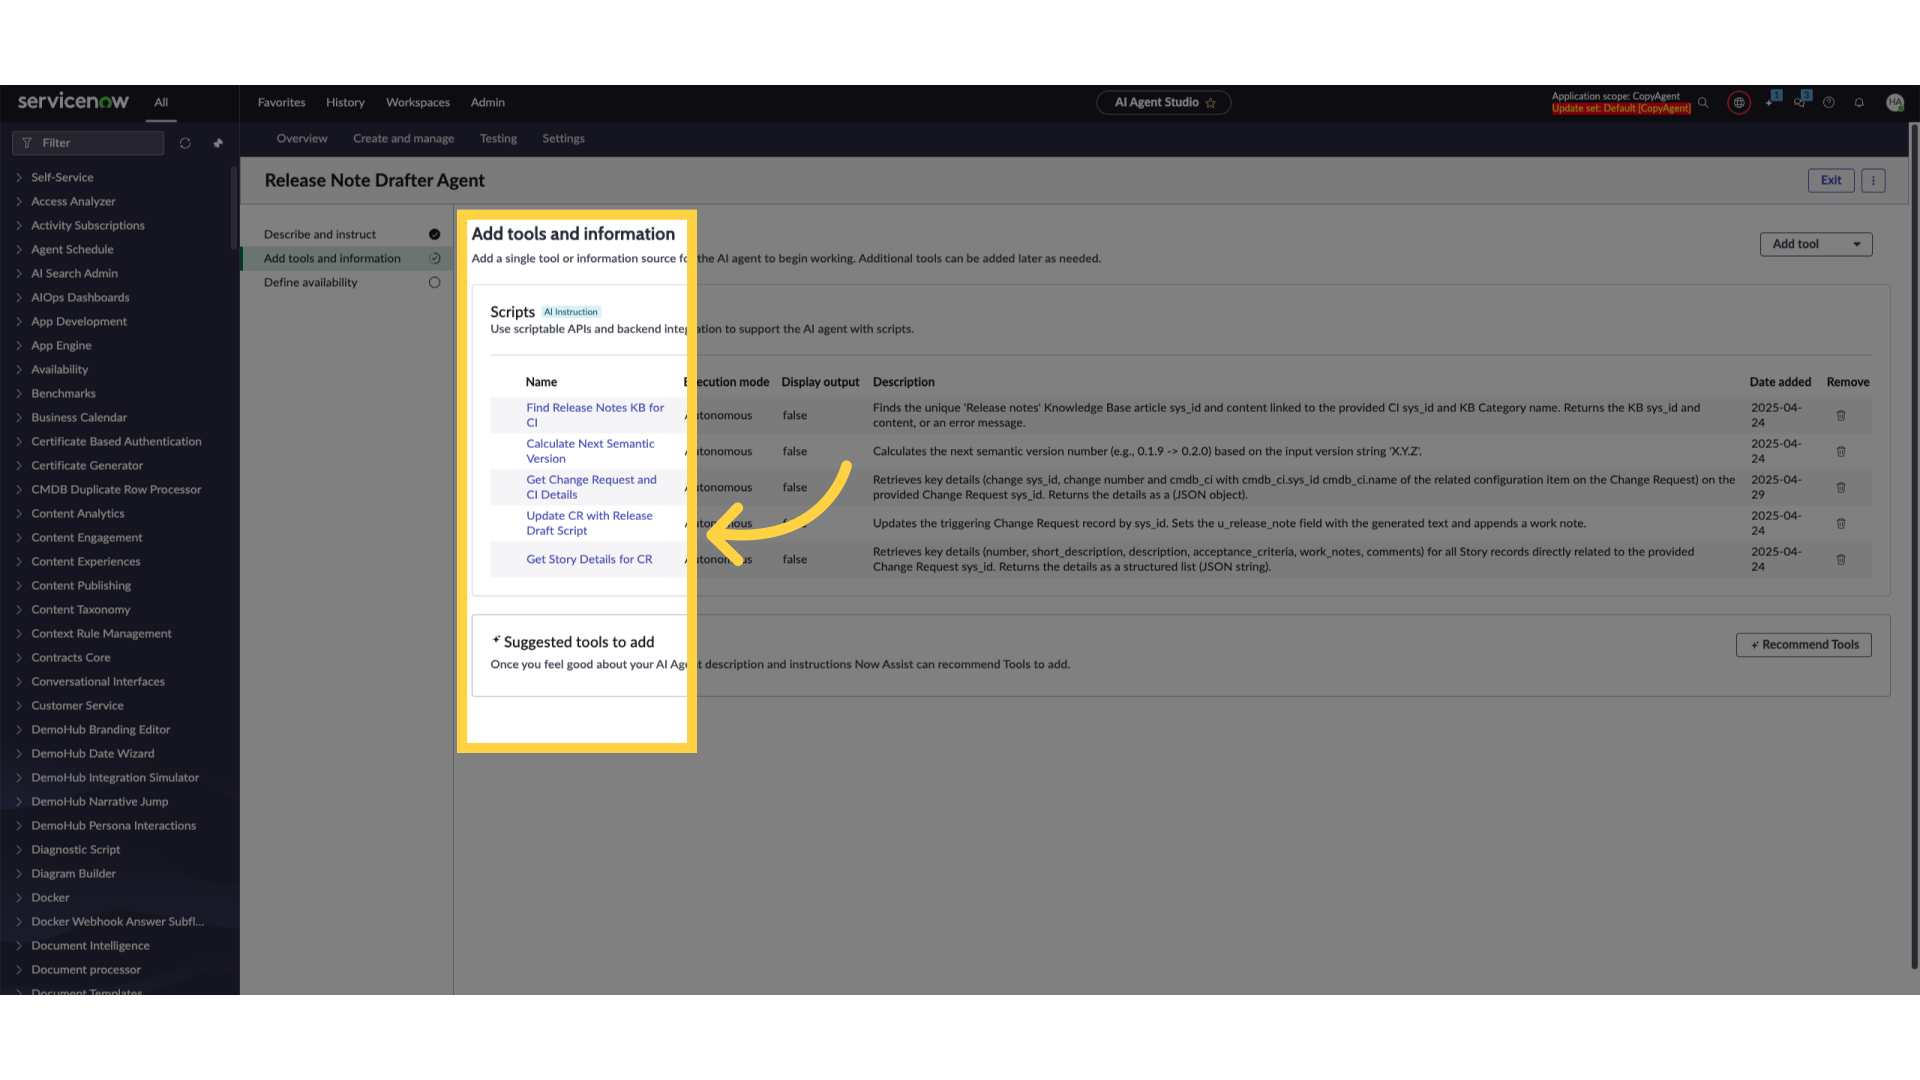
5. Create the rest of tools
The agent can contains more tools, in this case it needs several other tools to function.
This guide covered the high-level creation of a ServiceNow AI Use case and AI Agent in AI Agent Studio to automate the generation of release notes. By following the instructions provided, you can optimize your workflow for creating detailed release notes based on completed development work. See implementation details here - Automating Release Notes: A Deep Dive into the ‘Generate Release Note Draft on Change’ AI Agent